- Published on
- | 12 mins read
Chap 3 - Add a Rive Animated Button to a Flutter Flame Game
- Authors
- Name
- Miller Go Dev
- @millergodev


Overview
Table of Contents
Problem
In the previous article, we added a pause button. But it's just a static image. How boring it is! Whenever a user taps on a button, she must have a "feeling" that it is like a "real" button, not a static image. In other words, it should be animated.
Ok, so how can we make an animated button?
Some solutions
As far as I know, there are at least 2 ways to add an animated button into a Flame-based Flutter game:
- Use the HudButtonComponent. It lets us set callbacks to handle tap events, but it requires us to provide 2 separate images for 2 states of a button: idle and pressed.
- Use the
RiveComponentfrom theflame_rivepackage along with theTappablemixin. We must get or create a Rive file using rive.app and manage to animate it on tap event. Sounds pretty harder but it opens the door to adding more awesome animations to our game.
So, I chose to use Rive with the hope that we can easily make this game such an animated beast once we get used to it.
Add flame_rive dependency
Run this command to add flame_rive package:
flutter pub add flame_rive
Our pubspec.yaml should become this:
    json_annotation: ^4.7.0
    flame: ^1.3.0
    flame_svg: ^1.5.0
+   flame_rive: ^1.5.1
Add the Rive file
To show an animation using Rive, we need a Rive file that has *.riv extension. To create that file, we need to use the rive.app editor. Open and register a FREE account to use it at editor.rive.app.
You can learn how to create animations with Rive on the Rive official documentation site. I prepared a buttons.riv file for you. It is supposed to contain all the Rive animated buttons for our game. However, for now, it is only having the animated pause button.
This is how the buttons.riv file looks like in the Rive editor:
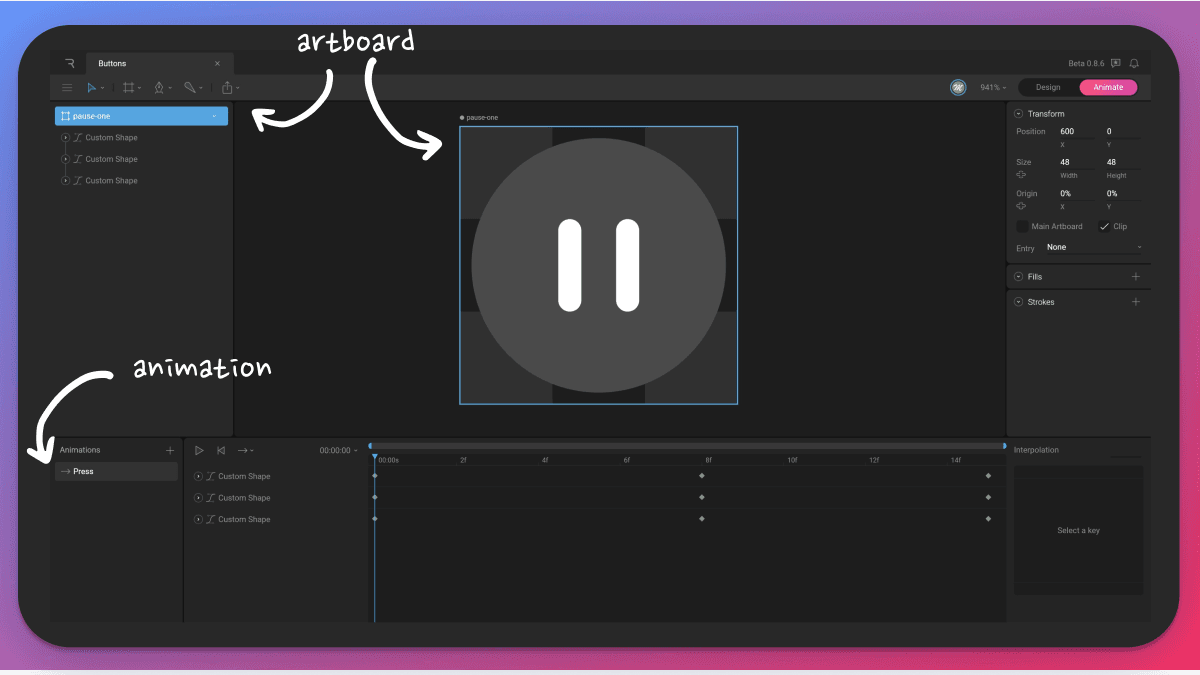
There are 2 main concepts you need to know about a Rive file. We will need them in the code.
artboard: Each Rive file can have multiple artboards. Each artboard contains a group of shapes that will show up as a single UI component on the screen.In this case, the artboard
pause-one(its name is the SVG file name I downloaded from IconPark) contains the pause button component. We can name the artboard whatever we want.animation: Each artboard can have multiple animations. Each animation is a series of states of the original object on the artboard. Of course, we have to design those states on our own. I just cut that design part from this article because it's out of scope.In this case, the animation
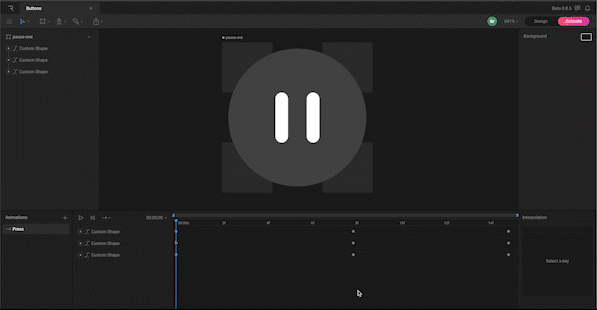
Press(we can name it whatever we want) will be like this if I press the play button:
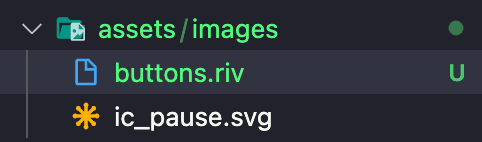
Now, we export this into the buttons.riv file and save it in the assets/images directory.
Play the Rive animation when tapping on the button
We need to load the Rive file into the app to use a Rive animation. Here are the code changes:
 import 'package:flame/game.dart';
-import 'package:flame_svg/flame_svg.dart';
+import 'package:flame_rive/flame_rive.dart';
 import 'package:flutter/widgets.dart';
+import 'package:rive/rive.dart';

class MainGame extends FlameGame {
   @override
   Color backgroundColor() => const Color(0xFFFFFFFF);

   @override
   Future<void>? onLoad() async {
-    final pauseIcon = await Svg.load('images/ic_pause.svg');
-    final pauseIconComponent = SvgComponent(
-      svg: pauseIcon,
+    final riveFile = RiveFile.asset('assets/images/buttons.riv');
+    final artboard = await loadArtboard(
+      riveFile,
+      artboardName: 'pause-one',
     );
+    final pauseIconComponent = RiveComponent(
+      artboard: artboard,
       position: Vector2.all(0),
       size: Vector2.all(100),
     );
   }
 }
In the main_game.dart file, we replace the old code that loads the SVG image. First, it loads the RiveFile by calling RiveFile.asset('assets/images/buttons.riv'). Then, we must specify which artboard we want to show on the screen. Do you remember the pause-one artboard I mentioned above? We load it by calling loadArtboard() with the pause-one value of the artboardName argument.
After that, we need to create a RiveComponent instance from that artboard instead of the SvgComponent. This component still needs to hold the size and position, so that the game knows how to draw it on the screen.
Do you notice that we imported the rive/rive.dart package? We need it to be able to use the RiveFile class. So, remember to add the package to our app by running this command:
flutter pub add rive
And looking for the change in pubspec.yaml:
    json_annotation: ^4.7.0
    flame: ^1.3.0
    flame_svg: ^1.5.0
    flame_rive: ^1.5.1
+   rive: ^0.9.1
Here is the full current code in main_game.dart:
import 'package:flame/game.dart';
import 'package:flame_rive/flame_rive.dart';
import 'package:flutter/widgets.dart';
import 'package:rive/rive.dart';
class MainGame extends FlameGame {
Color backgroundColor() => const Color(0xFFFFFFFF);
Future<void>? onLoad() async {
final riveFile = RiveFile.asset('assets/images/btn_pause.riv');
final artboard = await loadArtboard(
riveFile,
artboardName: 'pause-one',
);
final pauseIconComponent = RiveComponent(
artboard: artboard,
position: Vector2.all(0),
size: Vector2.all(100),
);
await add(pauseIconComponent);
}
}
Let's run the app!
Trigger the animation
But the button hasn't animated when we tap it. To achieve that, we need to do 2 things:
- Detect tap events to run our code.
- The code must run the animation.
Our main_game.dart will become this:
+import 'package:flame/components.dart';
 import 'package:flame/game.dart';
 import 'package:flame_rive/flame_rive.dart';
 import 'package:flutter/widgets.dart';
 import 'package:rive/rive.dart';

-class MainGame extends FlameGame {
+class PauseBtnComponent extends RiveComponent with Tappable {
+  PauseBtnComponent({required super.artboard})
+      : super(
+          position: Vector2.all(0),
+          size: Vector2.all(100),
+        );
+}
+
+class MainGame extends FlameGame with HasTappables {
   @override
   Color backgroundColor() => const Color(0xFFFFFFFF);
   ...
       riveFile,
       artboardName: 'pause-one',
     );
-    final pauseIconComponent = RiveComponent(
-      artboard: artboard,
-      position: Vector2.all(0),
-      size: Vector2.all(100),
-    );
+    final pauseIconComponent = PauseBtnComponent(artboard: artboard);
     await add(pauseIconComponent);
   }
 }
The RiveComponent doesn't have the ability to detect tap events. To extend its ability, we must create a separate class to extend the RiveComponent class and combine with the Tappable mixin. This mixin has the ability to handle tap events. So, the PauseBtnComponent class also inherits that ability. We are gonna handle the tap event in a callback function later.
In Flame engine, if a game contains at least 1 Tappable component, the game class must inherit the HasTappables mixin. Otherwise, it will throw this exception message: Tappable components can only be added to a FlameGame with HasTappables. So, we must add with HasTappables to our FlameGame class to make it work.
Now, to run the animation on a tap down event, we need to change our code again:
 import 'package:flame/game.dart';
+import 'package:flame/input.dart';
 import 'package:flame_rive/flame_rive.dart';
 import 'package:flutter/widgets.dart';
 import 'package:rive/rive.dart';

 class PauseBtnComponent extends RiveComponent with Tappable {
           position: Vector2.all(0),
           size: Vector2.all(100),
         );
+
+  late final RiveAnimationController _controller;
+
+  @override
+  Future<void>? onLoad() {
+    _controller = OneShotAnimation('Press', autoplay: false);
+    artboard.addController(_controller);
+    return super.onLoad();
+  }
+
+  @override
+  bool onTapDown(TapDownInfo info) {
+    _controller.isActive = true;
+    return true;
+  }
 }

 class MainGame extends FlameGame with HasTappables {
To be able to run the animation, we grab a RiveAnimationController. In this case, we want the animation to run from start to end and then stop until the next tap event. So, it should be an OneShotAnimation. We pass the Press argument, which is the name of our animation in the artboard pause-one in our Rive file if you still remember. The autoplay named argument is false because we don't want it to play right after the button shows up. We will trigger the animation on our will later.
Then, remember to attach this new controller to the artboard by calling addController() function. Otherwise, the artboard will not run the animation.
Now, in a Tappable object, the onTapDown() callback will be called on a tap down event. So, we override it and change the isActive of the _controller to true here. That means the animation specified in the controller will run.
That's all, this is the full code of the main_game.dart file:
import 'package:flame/components.dart';
import 'package:flame/game.dart';
import 'package:flame/input.dart';
import 'package:flame_rive/flame_rive.dart';
import 'package:flutter/widgets.dart';
import 'package:rive/rive.dart';
class PauseBtnComponent extends RiveComponent with Tappable {
PauseBtnComponent({required super.artboard})
: super(
position: Vector2.all(0),
size: Vector2.all(50),
);
late final RiveAnimationController _controller;
Future<void>? onLoad() {
_controller = OneShotAnimation('Press', autoplay: false);
artboard.addController(_controller);
return super.onLoad();
}
bool onTapDown(TapDownInfo info) {
_controller.isActive = true;
return true;
}
}
class MainGame extends FlameGame {
Color backgroundColor() => const Color(0xFFFFFFFF);
Future<void>? onLoad() async {
final riveFile = RiveFile.asset('assets/images/buttons.riv');
final artboard = await loadArtboard(
riveFile,
artboardName: 'pause-one',
);
final pauseIconComponent = PauseBtnComponent(artboard: artboard);
await add(pauseIconComponent);
}
}
Let's run the app!
It's good.
Check out the commit for this article in this pull request.